zabbix还能和eNSP这么玩?这个联动实验简直不要太6
01 下载Zabbix
下载链接:
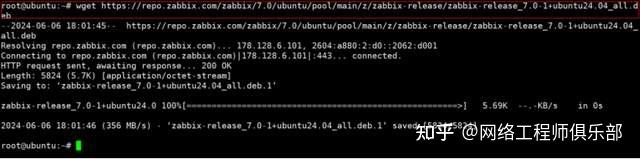
下载完成后查看下载文件

02 安装Zabbix
dpkg -i zabbix-release_7.0-1+ubuntu24.04_all.deb
03 安装mysql php等
apt update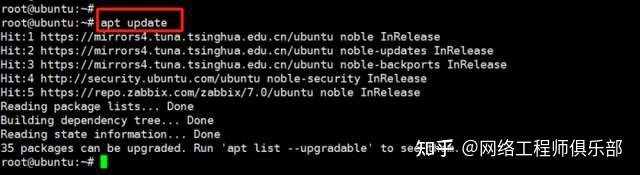
apt install zabbix-server-mysql zabbix-frontend-php zabbix-apache-conf zabbix-sql-scripts zabbix-agent mysql-server
中途会有确认安装选择y即可,等待最后安装完成。
04 开启mysql并创建Zabbix数据库
systemctl enable mysql
systemctl restart mysql
mysql -uroot -p输入mysql root密码(默认为空)可以通过下面SQL语句设置(密码为spoto)
USE mysql;
ALTER USER 'root'@'localhost' IDENTIFIED BY 'spoto';
FLUSH PRIVILEGES;
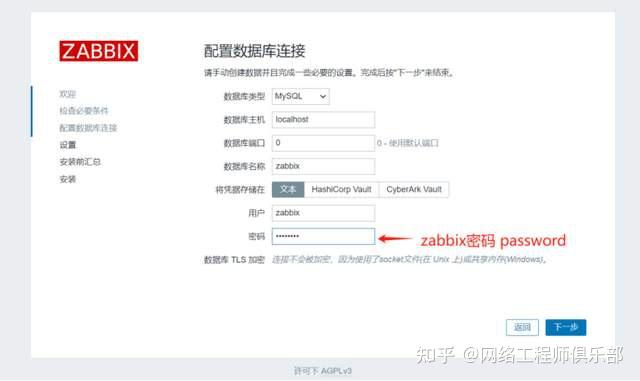
EXIT;修改密码后重新登录mysql创建Zabbix数据库(用户名zabbix 密码password)
mysql -uroot -p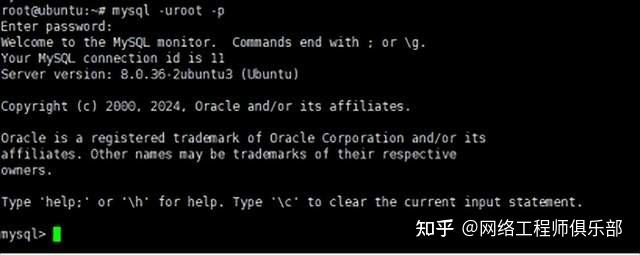
mysql> create database zabbix character set utf8mb4 collate utf8mb4_bin;


mysql> create user zabbix@localhost identified by 'password';


mysql> grant all privileges on zabbix.* to zabbix@localhost;


mysql> set global log_bin_trust_function_creators = 1;


mysql> quit;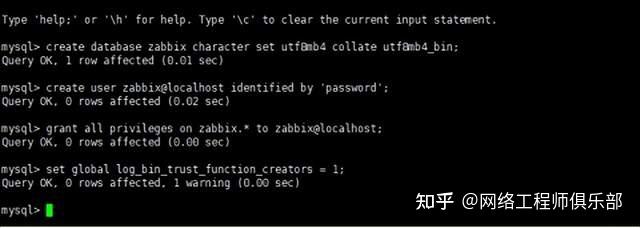
05 导入数据库
zcat /usr/share/zabbix-sql-scripts/mysql/server.sql.gz | mysql --default-character-set=utf8mb4 -uzabbix -p zabbix输入zabbix密码password

这里导入得速度比较慢需要耐心等待
导入完成

06 导入数据库架构后禁用log-bin-trust-function-creators选项。
# mysql -uroot -p


输入mysql root密码


mysql> set global log_bin_trust_function_creators = 0;


mysql> quit;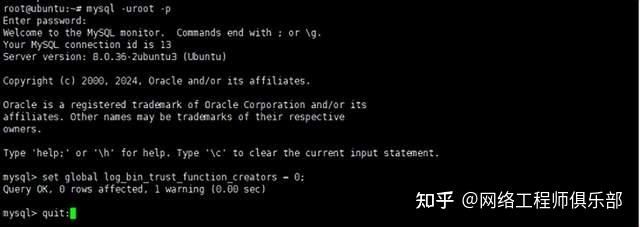
07 编辑zabbix配置文件
vim /etc/zabbix/zabbix_server.conf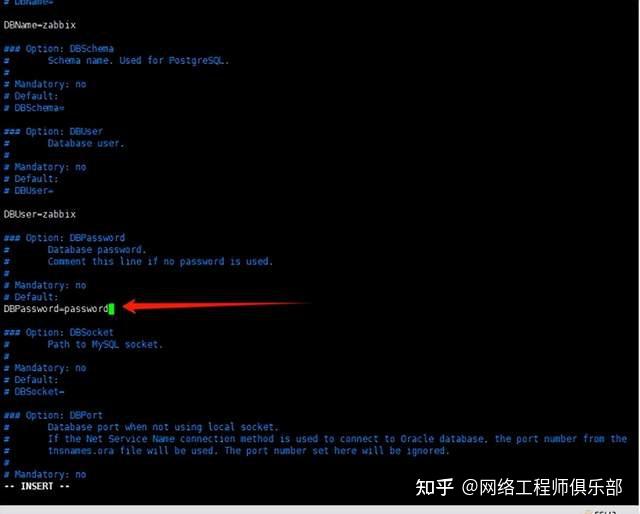
08 重启服务并设置开机自启
systemctl restart zabbix-server zabbix-agent apache2
systemctl enable zabbix-server zabbix-agent apache2
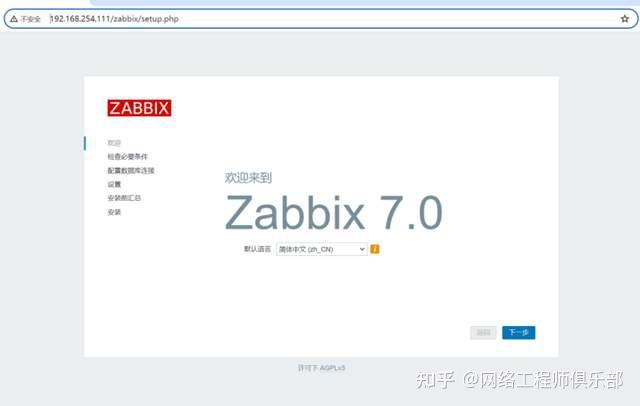
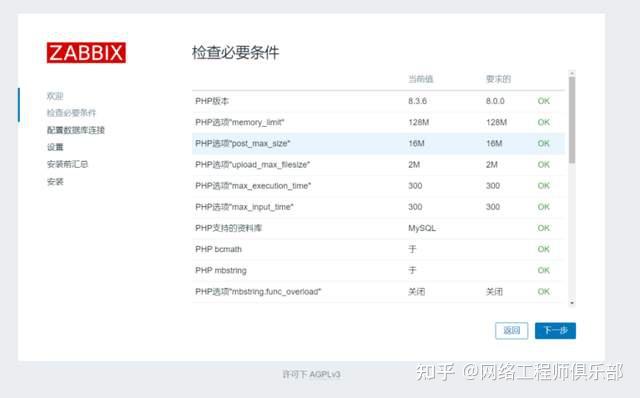
09 初始化并登录zabbix
http://zabbix服务器地址/zabbix/
1、选择语言
2、环境检查
3、配置数据库连接
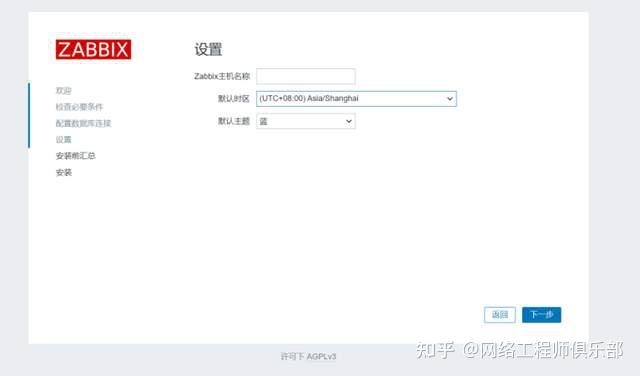
4、设置
5、安装前汇总

6、安装完成

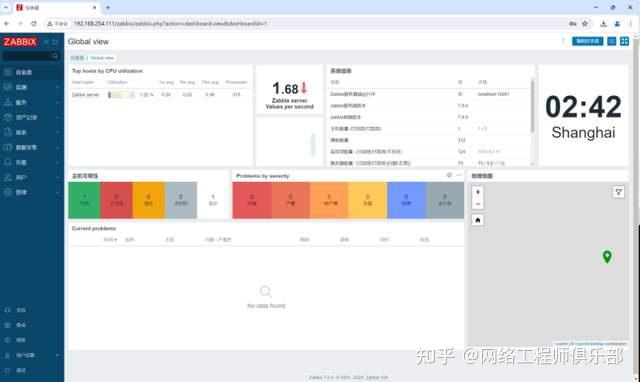
7、登录

8、登录成功
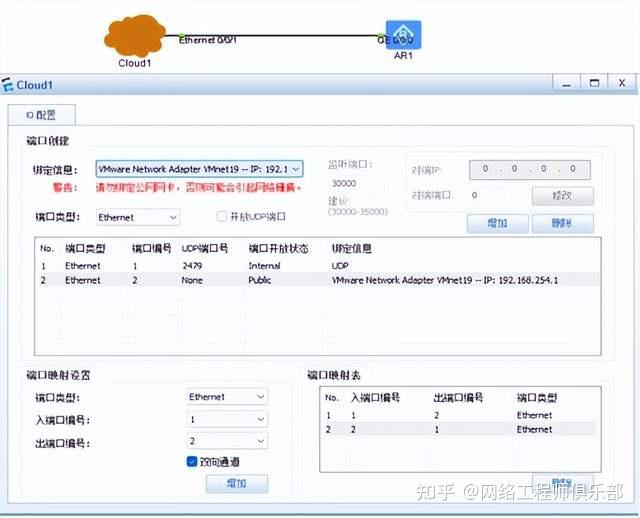
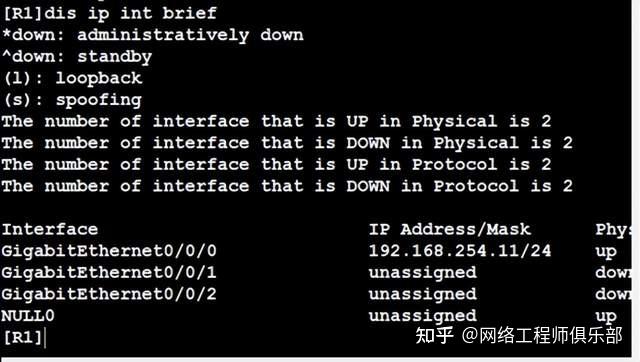
10 zabbix与ENSP联动实验
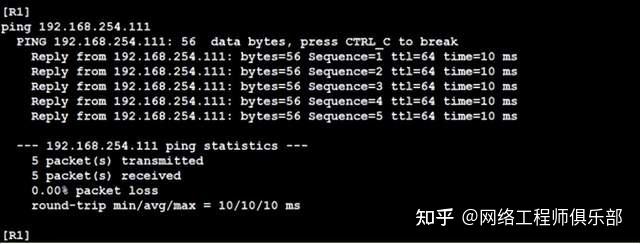
ENSP中AR2220与zabbix桥接到同一网卡并配置IP,确保服务器与ENSP AR2220可以互访
配置AR2220 SNMP
snmp-agent community write spoto //配置读写团体名
snmp-agent target-host trap-hostname spoto address 192.168.254.111 udp-port 161 trap-paramsname spoto //配置Trap报文的目的主机
snmp-agent trap enable //开启trap功能
snmp-agent //开启snmp
zabbix服务器安装net-snmp并获取AR信息
apt-get install net-snmp -y
snmpwalk -c spoto -v 2c 192.168.254.11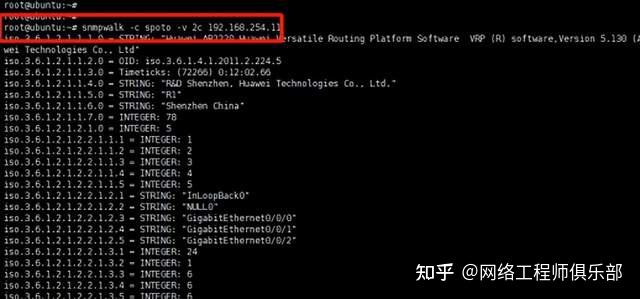
获取过程比较漫长。。。大约5分钟
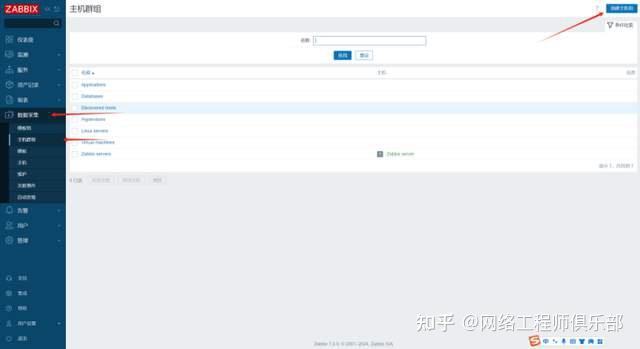
获取完成后配置zabbix
创建主机组

创建检测主机

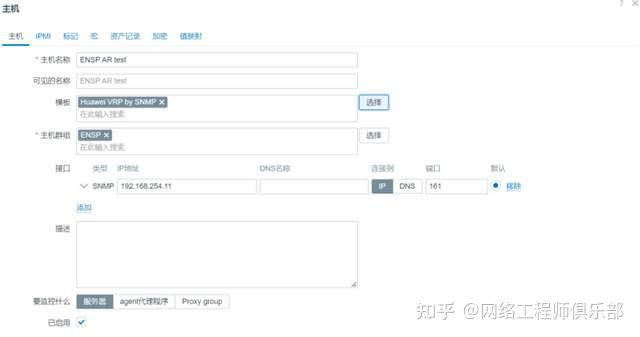
添加完成

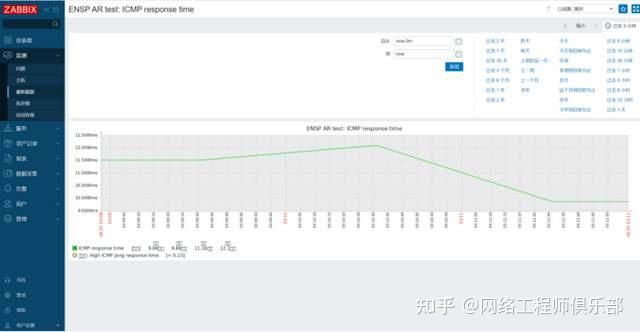
统计到过去3分钟ICMP流量
阅读剩余
版权声明:
作者:SE_YJ
链接:https://www.cnesa.cn/2642.html
文章版权归作者所有,未经允许请勿转载。
THE END